Oct 03, 2026
•
15 min read


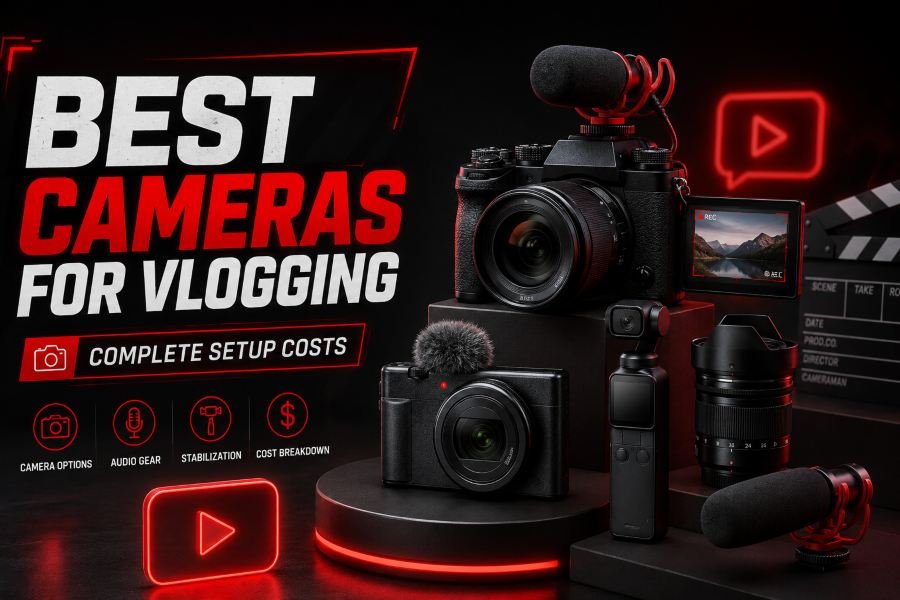
The best cameras for vlogging are not always the cameras with the lowest body price or the longest specification sheet. The smarter purchase is the camera that gives you the lowest complete cost for the footage you actually need, once the lens, audio, stabilization, storage, and power are included.
For most beginners, the Canon EOS R50 V offers a sensible balance of price and creator-focused features. For walking and travel content, the DJI Osmo Pocket 4 removes more setup friction than a traditional mirrorless body, while the Sony a6700 is my strongest hybrid recommendation for creators who want one serious camera for both photography and video.
A $1,500 camera can easily become a $2,300–$2,500 creator setup after you add a suitable lens and accessories. That is why this guide uses a more useful buying metric: Ready-to-Vlog Cost.
Ready-to-Vlog Cost = Camera + Lens + Audio + Stabilization + Power + Storage
The takeaway is straightforward: do not compare camera boxes. Compare complete systems that can actually record the kind of videos you want to publish.
The best cameras for vlogging change when you include the equipment required to make each camera usable. A body that appears inexpensive can become costly after you add a wide lens, microphone, batteries, memory, and stabilization, while a more integrated camera may need almost nothing beyond audio.
For travel and walk-and-talk creators, the DJI Osmo Pocket 4 is one of the most efficient complete setups because its lens, screen, tracking, three-axis stabilization, and substantial internal storage are already integrated. You can start filming without first building a mirrorless rig around the camera.
The Canon PowerShot V1 is the strongest all-in-one choice for creators who want a conventional camera experience without entering an interchangeable-lens system. Its built-in zoom means the amount you pay for the camera is much closer to the amount you need to spend before recording.
The Canon EOS R50 V is my beginner mirrorless recommendation because its creator-oriented body and wide kit-lens option keep the total setup cost under control. It gives new creators enough room to improve without forcing them into a high-end camera system immediately.
The Sony a6700 is the stronger choice for hybrid creators who need serious photography and video capabilities from one body. It costs more once a lens is included, but it offers IBIS, advanced autofocus, 4K/120p, 10-bit recording, strong still-image performance, and a broad APS-C lens ecosystem.
The Fujifilm X-M5 stands out for creators who routinely turn one shoot into both long-form YouTube videos and vertical Shorts. Its high-resolution 6.2K recording gives you more room to crop and reframe one source clip for different formats.
The Sony A7C II belongs in a different category because it makes sense when full-frame imaging is a specific requirement. Most vloggers do not need to pay for full-frame lenses and a more expensive system unless they already understand why those characteristics matter to their work.
In summary, the cheapest body is rarely the most useful comparison point. The camera that requires the least unnecessary extra spending for your workflow usually delivers better value.
Camera price tells you what your first purchase costs, but Ready-to-Vlog Cost tells you what your usable setup costs. That difference can be hundreds or even thousands of dollars once you add everything needed for consistent production.
A mirrorless body without the right lens is not a working vlog setup. A camera with unreliable audio, insufficient storage, limited battery life, or shaky handheld footage is not complete either, even if the body itself was inexpensive.
I divide the cost of a vlogging setup into six parts: the camera, lens, audio, stabilization, power, and storage. Every buying decision should account for all six, even when some of them are already built into the camera.
Suppose one body costs $900 and another costs $1,500. The first camera appears to save $600, but that advantage disappears quickly if it requires a $500 lens and additional stabilization while the more expensive body already includes IBIS and works with a compact lens.
For budgeting, it is reasonable to leave around $100–$150 for audio, $40–$70 for storage, and roughly $60–$100 for additional power or a grip. These are planning numbers rather than fixed prices, because the exact equipment you choose will depend on the way you shoot.
This is also where many creators overspend because they treat the camera body as the entire production system. Before ordering anything, browse the broader collection of free YouTube tools and think about the full creator workflow, because recording is only one part of getting a video from an idea to a published result.
The key point is that a lower camera price does not automatically mean a lower production cost. A slightly more expensive camera can be the better financial decision when it eliminates lenses, gimbals, or other equipment you would otherwise have to buy separately.
The Sony a6700 is my strongest hybrid choice if you need one body for serious photography and serious video. It is not my first recommendation for someone who only wants a simple walk-and-talk vlog camera, because much of what makes it expensive would go unused.
The a6700 uses a 26MP APS-C sensor and combines advanced subject recognition with five-axis in-body image stabilization. It can produce detailed 4K footage from a higher-resolution sensor readout while supporting 10-bit video, S-Log3, and high-frame-rate 4K recording.
That combination makes the a6700 more than a basic vlogging camera. It can handle YouTube videos, thumbnails, photography, product images, interviews, travel footage, client work, social content, and cinematic B-roll without forcing you to switch to a second camera system.
The value becomes easier to understand when you look at what a hybrid creator would otherwise need. If you buy one inexpensive video-first body today and then replace it with a stronger photography camera or advanced video body 18 months later, the supposedly cheaper purchase can become the more expensive path.
Sony's autofocus is one of the a6700's strongest practical advantages for solo creators. Face and eye tracking reduce the chance of returning from a shoot with footage that looked sharp on a small screen but missed focus when you started moving.
The IBIS system is another reason the camera earns its price. It does not replace a three-axis gimbal for aggressive walking footage, but it gives you stabilization with lenses that do not contain optical stabilization and makes handheld shooting far more forgiving.
The drawback is that the body itself is only the beginning of the purchase. Once you add a suitable lens, microphone, storage, and extra power, a roughly $1,500 camera can become a setup costing well above $2,000.
The takeaway is that the Sony a6700 is expensive when judged as a simple vlog camera, but it becomes easier to justify when one body needs to cover photography, advanced video, client work, and long-term lens upgrades.
The Sigma 18–50mm f/2.8 is the better all-purpose choice, while the Sigma 10–18mm f/2.8 makes more sense for arm's-length and travel vlogging. Choosing between them matters because focal length changes the practical usability of the a6700 more than many buyers realize.
The Sigma 18–50mm f/2.8 is my preferred option for creators who mix talking-head videos, product reviews, photography, B-roll, interviews, and general YouTube production. Its constant f/2.8 aperture gives you better low-light flexibility and more background separation than a slower kit zoom.
The problem is the wide end. On Sony APS-C, 18mm gives you roughly a 27mm full-frame-equivalent view, which is perfectly useful on a tripod but can feel tight when the camera is held close to your face.
That limitation becomes more noticeable when electronic stabilization or high-frame-rate recording crops the image. A lens that appears wide enough while browsing specifications can suddenly feel restrictive once the real shooting mode is activated.
For handheld vloggers, the Sigma 10–18mm f/2.8 is the more practical choice. Its ultra-wide range gives you more environmental context, makes arm's-length framing easier, and leaves more room for stabilization crops.
This matters particularly when you film inside cars, hotel rooms, small offices, crowded streets, or any other environment where you cannot simply move the camera farther away. Wider framing is a functional advantage in these situations, not just a stylistic preference.
Sigma's f/1.4 APS-C primes are another option when background separation and low-light performance matter more than zoom flexibility. A fast prime can create a stronger cinematic look, but you lose the ability to reframe quickly without physically moving the camera or changing lenses.
In summary, do not choose your a6700 lens based on which lens is most frequently recommended in camera reviews. Choose it based on the shot you make most often, because your dominant shooting distance should determine your focal range.
Sony a6700 4K/120p is genuinely useful for slow-motion B-roll, but it should not be the main reason you buy the camera for ordinary face-to-camera vlogging. High-frame-rate specifications look impressive, yet the shooting limitations around them matter more than the headline number.
The a6700's 4K/120p mode uses an approximately 38% crop. That means the effective field of view becomes much tighter, which can make an otherwise practical lens feel restrictive for close handheld shooting.
Active electronic stabilization is also unavailable at 120p, so the mode changes more than the frame rate. You need to think about both framing and stabilization before treating 4K/120p as a straightforward upgrade over 4K/30p or 4K/60p.
For slow-motion product shots, travel details, action sequences, food footage, transitions, and cinematic B-roll, 4K/120p is a valuable creative tool. You can slow clips substantially while retaining 4K resolution, which is useful when those shots are mixed into a polished long-form video.
For continuous talking-head footage, however, the feature has little practical value. Viewers will notice bad framing, weak audio, or unstable footage long before they care that the camera used for the video can record 120 frames per second.
The takeaway is that high frame rates should solve a creative requirement rather than justify a larger camera budget. Buy 4K/120p because you know where it fits into your editing workflow, not because the number looks better on a specification sheet.
The DJI Osmo Pocket 4 is efficient because it integrates hardware that mirrorless creators normally purchase and assemble separately. Its camera, lens, display, subject tracking, three-axis mechanical stabilization, and substantial internal storage are combined in one portable device.
That integration eliminates several major purchasing decisions. You do not need to select an interchangeable lens, buy a conventional gimbal, build a cage, or carry a larger bag before the camera becomes useful for mobile filming.
The Pocket 4 is particularly strong for travel creators, city vloggers, event coverage, daily vloggers, and behind-the-scenes content. Those workflows reward a camera that can move from pocket to recording quickly because spontaneous moments disappear while larger rigs are still being assembled.
This leads to an important concept: capture friction. Capture friction is the amount of time, equipment, and decision-making required between seeing something worth filming and successfully recording it.
A camera with slightly better image quality can still be the worse vlogging tool when its capture friction is high. The technically superior camera sitting in a hotel room because the rig is inconvenient produces no footage at all.
The Pocket 4 does not replace a mirrorless system for creators who need different lenses, advanced photography, or specialized focal lengths. Its advantage is that mobile creators can record stabilized footage without building the camera into a larger system.
In summary, integration is a form of value. For creators who move constantly, removing equipment can be worth more than adding specifications.
The Canon PowerShot V1 is one of the strongest all-in-one choices for creators who want a traditional camera experience without committing to an interchangeable-lens system. Its built-in zoom keeps the complete setup cost lower and reduces the number of purchasing decisions you need to make.
The PowerShot V1 includes a useful 16–50mm-equivalent zoom range, which covers wide talking-head framing through tighter general-purpose shots. That makes it more adaptable than a fixed ultra-wide pocket camera without creating the lens-buying costs of a mirrorless body.
It also provides video-oriented features such as Canon Log 3 and active cooling. Those features matter for creators who want more control over color and need to record longer sessions without treating the camera as a basic point-and-shoot device.
The most important financial advantage is simple: you do not need to buy a separate lens. A creator can put more of the remaining budget toward a microphone, memory, power, lighting, or other equipment that viewers may notice more immediately.
At around the $900 camera level, a sensible complete creator setup can remain close to the $1,150–$1,250 range depending on the accessories you choose. That is substantially less than a Sony a6700 system built with a high-quality zoom.
The tradeoff is long-term flexibility. If your channel eventually requires specialty lenses, extreme low-light capability, or a particular cinematic focal length, the fixed lens becomes a limitation rather than an advantage.
The key point is that fixed-lens cameras often lose conventional specification comparisons but win complete-cost comparisons. For many YouTube creators, that is the more useful calculation.
For many new creators, the Canon EOS R50 V is a smarter purchase than a premium hybrid camera because it concentrates more of the budget on features beginners will actually use. It offers an APS-C sensor, creator-focused controls, and a practical wide kit-lens option without immediately pushing the setup above $2,000.
The R50 V's video-first design makes it easier to recommend for someone entering YouTube with no existing camera system. A front recording button, vertical-friendly controls, microphone connectivity, and a creator-oriented kit all reduce the amount of adaptation required.
Its 14–30mm kit lens is especially useful because the wide end is more suitable for vlog framing than many conventional APS-C standard zooms. Starting wider means you are less likely to discover after buying the camera that your face fills too much of the frame.
A full beginner setup can often remain around the $1,150–$1,250 level once basic audio, storage, and power are included. That leaves a meaningful gap between the R50 V and an a6700 setup that can exceed $2,300.
What you give up is technical headroom. The Sony provides IBIS, more advanced hybrid capabilities, and stronger high-frame-rate options, while the Canon is positioned more directly toward video-first beginners.
That difference is not automatically a problem. If your actual workflow consists of tutorials, talking heads, product demonstrations, Shorts, and occasional handheld footage, paying another $1,000 for capabilities you rarely use does not improve the economics of your channel.
In summary, the R50 V is the stronger beginner buy when your content needs are simpler than your camera ambitions. Upgrade only when your existing setup creates a clear limitation.
The Fujifilm X-M5 is especially compelling when one recording session needs to produce both horizontal long-form videos and vertical short-form content. Its 6.2K recording gives you more room to reframe footage without starting every format from a separate take.
The value of 6.2K is not that every viewer needs to watch your content at 6K resolution. The practical advantage is having additional pixels available for cropping, digital punch-ins, alternate compositions, and vertical conversions.
That means one wide 6.2K source clip can potentially become a 16:9 YouTube shot, a 9:16 YouTube Short, a closer crop for a social teaser, and an alternate composition for another platform. This reduces reshoots and gives editors more flexibility.
The X-M5 is also unusually light for an APS-C interchangeable-lens camera. That improves travel usability and makes the body attractive to creators who want lens flexibility without carrying a large system.
Its main compromise is stabilization. The body depends more heavily on digital methods and lens choices than a camera such as the a6700 with in-body stabilization.
The takeaway is that high resolution becomes valuable when it reduces production work. If you regularly repurpose footage across platforms, the X-M5's 6.2K capture has a clearer business case than it does for creators publishing only standard 4K talking-head videos.
For most vloggers, the Sony A7C II is not automatically a better purchase than the a6700 simply because it uses a full-frame sensor. Buy it when you already understand the specific full-frame advantage your production needs.
Full frame can provide stronger low-light flexibility, different depth-of-field characteristics, and access to particular full-frame lenses. Those benefits matter in professional photography, controlled cinematic work, and some low-light environments.
The cost is not limited to the body. Full-frame lenses can be more expensive and larger, which affects both total system cost and how much equipment you want to carry during everyday production.
The a6700 already provides advanced autofocus, IBIS, strong 4K quality, high-frame-rate recording, and access to compact APS-C lenses. For many creators, those characteristics provide a better balance between image quality, portability, and total spending.
This becomes especially obvious in controlled environments. If you film yourself in a well-lit studio at moderate apertures, viewers are unlikely to stay longer because the camera sensor is physically larger.
In summary, full frame is an imaging choice, not a creator-success level. Move to full frame because your work requires it, not because camera marketing has positioned it as the automatic next step.
A complete vlogging setup can cost hundreds or thousands more than the advertised body price. The useful number is the amount required to record dependable footage, not the amount printed beside the camera in an online store.
For a DJI Osmo Pocket 4 setup, the major extra purchase is usually audio plus optional accessories. You avoid the immediate cost of an interchangeable lens and conventional gimbal, which keeps the system efficient for mobile production.
For the Canon PowerShot V1, the camera itself sits around the $900 level before accessories. Once you add audio, memory, and additional power, a practical setup can remain around the $1,150–$1,250 range.
For the Canon EOS R50 V, the body-and-kit-lens combination can sit around the $900–$950 level depending on promotions. A complete beginner setup again tends to land around the $1,150–$1,250 range once basic accessories are included.
For the Sony a6700 with the Sigma 18–50mm f/2.8, the camera and lens alone reach roughly the $2,100 level. After adding audio, storage, and power, the complete setup can approach approximately $2,350–$2,450.
For the Sony a6700 with the wider Sigma 10–18mm f/2.8, the complete price can move closer to $2,450–$2,550. That higher cost may still make sense for a serious Sony user whose channel depends heavily on handheld wide-angle footage.
A Sony A7C II setup usually starts above these figures once a suitable full-frame lens and accessories are included. That is why I would not move into the full-frame category unless the sensor format itself solves a specific production problem.
The YouTubeToolkit Ready-to-Vlog Cost formula is therefore simple: add the camera body, lens, audio, stabilization, power, and memory, then estimate what you are likely to purchase during the next 12 months. That second step exposes upgrades such as a better microphone, second lens, ND filter, cage, monitor, gimbal, or additional batteries.
The key point is that a $900 setup you keep unchanged for two years can be cheaper than a $700 setup that triggers $800 of upgrades. Compare systems over time rather than judging the first transaction.
If $1,000 is your total budget, spending the full amount on the camera body is usually a mistake. You need enough money left for audio, storage, and power, because those components affect the usability of the camera from the first day.
A $999 body-only camera gives you almost no room to solve those supporting requirements. That means a slightly cheaper kit or fixed-lens camera can become the more capable real-world setup.
Try to reserve at least 15–25% of your total budget for accessories. The exact percentage depends on whether the camera already includes a useful lens and whether your recording environment requires external stabilization.
This is why creator-focused kits such as the EOS R50 V become attractive when priced competitively. The lens is already included, so the remaining budget can go toward the microphone, SD card, battery, or compact light that improves the actual video.
The PowerShot V1 makes a similar case from another direction. Its built-in zoom keeps you from immediately spending several hundred dollars on glass before you can start filming.
In summary, a strict $1,000 budget should be treated as a complete-system budget. Owning a more expensive body with weak supporting gear is usually worse than owning a balanced setup.
The Sony a6700 is worth a $2,000-plus setup when you are building a broader creator system rather than buying a camera only for basic talking-head videos. Its strongest value comes from the range of work it can replace, not from any single specification.
The a6700 gives you advanced autofocus, eye tracking, IBIS, detailed 4K, 10-bit recording, S-Log3, 4K/120p, strong photography, and extensive lens choices. That is enough capability to support YouTube, photography, client work, product content, travel, and more controlled cinematic projects.
Those capabilities become expensive when they remain unused. If you never shoot photography, never color-grade, never change lenses, and never use high-frame-rate footage, you are paying for technical headroom that does not materially improve your videos.
That should not be confused with future-proofing. Future-proofing is paying for a capability you have a reasonable path to use, while overbuying is paying for specifications simply because they sound professional.
For a hybrid creator, the economics become much more favorable. If the same camera handles product photographs, thumbnails, YouTube videos, social content, client shoots, and personal photography, the system cost is distributed across far more work.
The takeaway is that the a6700 becomes excellent value when your workflow is broad enough to use the features that make it expensive. It is a poor value when you are buying those features only because they appear higher on a specification sheet.
Most guides rank cameras before defining what it costs to make each one useful for a specific creator. That reverses the buying process and encourages readers to compare bodies instead of solving production problems.
The correct order is to identify what you film, determine the equipment that workflow requires, and then choose the least expensive setup that solves those requirements without unnecessary complexity.
A walking creator should prioritize stabilization, wide framing, low carry weight, subject tracking, quick setup, and dependable mobile audio. A desk creator should prioritize autofocus, a useful lens, clean audio, continuous power, and heat management.
A hybrid photo-and-video creator needs a different set of priorities, including still-image quality, IBIS, lens flexibility, autofocus, and advanced video headroom. Those three workflows should not logically produce the same universal “best overall” camera.
This is also where competitor research matters. Before publishing your own buying or review videos, use the YouTube Tag Finder to study the language and topical patterns competing channels use, then build your positioning around the gaps they leave open.
The key point is that “best overall” is useful for organizing an article, but it is weak as a buying strategy. Your workflow should determine the winner before a publication's category label does.
Choose the camera that removes the most expensive or disruptive problem from your normal workflow. That approach produces more reliable buying decisions than choosing the camera with the highest specification ceiling.
If you walk while filming, I would choose the DJI Osmo Pocket 4 because its integrated mechanical stabilization removes one of the hardest problems in mobile vlogging. The low capture friction is more valuable than interchangeable lenses for creators who record constantly while moving.
If you are starting your first serious YouTube channel, I would choose the Canon EOS R50 V because the video-focused design and useful kit lens create a balanced entry point. You get room to grow without immediately building a premium system.
If you dislike changing lenses, the Canon PowerShot V1 makes more sense. Its integrated zoom keeps the total setup simpler while still giving you a more conventional camera experience than a pocket gimbal.
If you create both photography and video, I would choose the Sony a6700 with the Sigma 18–50mm f/2.8. That combination gives you a strong balance of still-image quality, autofocus, stabilized video, zoom flexibility, and long-term system growth.
If you use Sony and handheld selfie vlogging is a priority, I would pair the a6700 with the Sigma 10–18mm f/2.8. The wider field of view better absorbs stabilization and recording-mode crops while keeping more environment visible around you.
If you regularly turn one shoot into YouTube videos and Shorts, the Fujifilm X-M5 deserves serious consideration. Its high-resolution capture creates extra room to reframe one shot for several output formats.
If you specifically need full-frame imaging, the Sony A7C II is the logical premium option. Do not buy it simply because full frame sits above APS-C in the conventional camera hierarchy.
In summary, the camera should fit your production style before it fits your preferred brand. The strongest purchase is the one that removes the problem you face most often.
A better camera cannot rescue a topic nobody wants to watch, so topic research should happen before you press record. Once your gear is capable enough, the biggest gains often come from choosing a stronger subject, angle, and search intent.
Use the YouTube Keyword Finder before production to inspect the phrases creators already use around your topic. That helps you identify whether your planned video matches a real search pattern or whether the idea needs a more specific angle.
For example, “Sony a6700 review” is broad and competitive. A narrower topic such as “Sony a6700 for handheld vlogging” or “a6700 complete setup cost” may align more closely with an unresolved buying question.
You should also look beyond keywords and examine who the content is actually for. A teenager planning a first channel may need very different buying advice from an experienced creator building a client-ready hybrid rig, and YouTube participation itself has age and account requirements worth understanding; our guide on how old you have to be a YouTuber covers that separate issue.
The takeaway is that topic clarity should come before camera setup. Decide what specific question the video answers, then choose the equipment that can answer it visually.
Once the footage is finished, your next job is to make the video understandable to both viewers and YouTube before it is published. Good production quality creates the asset, but packaging determines whether people discover and choose it.
Start with the title and thumbnail because they carry most of the initial click decision. The title should communicate the exact problem or result, while the thumbnail should make the promise visually obvious without repeating the same sentence.
Then review your description, tags, and core metadata using the YouTube SEO Score Checker. This is useful as a final quality-control step because it forces you to examine whether the metadata consistently reflects the search intent of the video.
Do not treat an SEO score as a substitute for audience judgment. A perfectly formatted description cannot rescue a weak concept, while a compelling video can still underperform if its title and thumbnail fail to communicate why someone should watch.
The key point is that camera quality and metadata solve different problems. The camera helps you produce the content, while metadata helps the platform and potential viewer understand what the content is about.
Publishing should begin the feedback loop, not end the project. Once the video is live, the useful question is not whether your camera looked good but whether viewers clicked, stayed, and responded to the topic.
Compare the final video against competing channels and look at what changed between your idea and the published result. If a competing video continues to outperform yours, use the YouTube Tag Finder alongside manual competitor analysis to see whether you missed a topic cluster or framing pattern.
You should also track which videos begin moving your channel toward monetization rather than treating every upload as an isolated piece of content. The YouTube Monetization Checker can help you evaluate monetization-related status as your channel develops.
This is where a camera investment should ultimately be judged. A $2,400 system that helps you produce consistently, serve a clear audience, and publish higher-value content may be justified, while an expensive camera that slows your workflow and produces fewer videos may not be.
In summary, the camera is one part of a larger creator system. Topic selection, packaging, publishing, analysis, and monetization all determine whether the equipment produces a return.
Spend enough to remove the production bottleneck you can already identify, then stop spending until another real limitation appears. Buying beyond that point usually produces diminishing returns faster than creators expect.
If your footage shakes, improve stabilization before buying a larger sensor. If your indoor footage looks noisy, improve your lighting or lens speed before assuming you need full frame.
If your face regularly loses focus, prioritize autofocus. If viewers struggle to understand your speech, buy a better microphone before replacing a camera that already records clean 4K.
If your current camera produces technically solid footage but viewers leave after 30 seconds, the real problem may be the opening hook, pacing, story structure, topic, or viewer expectation. No sensor upgrade can repair those problems.
Creators often upgrade cameras because specifications are easy to compare. Content problems are harder to diagnose, so equipment becomes an attractive but often expensive distraction.
This is why a balanced creator workflow matters more than a premium body. Use your camera budget alongside research, production, editing, and publishing tools rather than treating image quality as the only variable that determines channel growth.
The takeaway is that the correct spending level is not “as much as you can afford.” It is the minimum complete system cost required to eliminate the production problems that are currently limiting your videos.
There is no single best camera for every vlogger, but there is a best complete setup for each workflow. The strongest buying decision comes from matching total system cost to the kind of footage you produce most often.
For walking and travel creators, I would choose the DJI Osmo Pocket 4 because integrated stabilization and low capture friction matter more than interchangeable lenses. It lets you record quickly without turning every outing into a camera-rigging exercise.
For beginners, the Canon EOS R50 V is easier to justify because it delivers a useful wide kit, creator-oriented controls, and room to grow without immediately crossing into premium-system pricing.
For creators who want a traditional all-in-one camera, the Canon PowerShot V1 is compelling because the lens is already part of the purchase. That keeps the total cost much closer to the advertised camera price.
For YouTube and Shorts creators who value reframing flexibility, the Fujifilm X-M5 offers a useful high-resolution workflow. Its 6.2K recording is most valuable when the same footage needs to serve several formats.
For creators who specifically need full-frame imaging, the Sony A7C II is the premium route. It only becomes a better value than APS-C when its full-frame advantages solve a problem you can already identify.
For serious hybrid creators, however, the Sony a6700 remains my strongest recommendation. When paired with the Sigma 18–50mm f/2.8 for general production or the Sigma 10–18mm f/2.8 for handheld vlogging, it provides a durable combination of photography, autofocus, IBIS, detailed 4K, 4K/120p, 10-bit recording, and lens flexibility.
The final takeaway is simple: do not buy the cheapest camera, and do not buy the most expensive camera you can afford. Buy the least expensive complete vlogging setup that solves the real problems your videos create, then put the rest of your time and budget into making better videos people actually want to watch.
Author
Youtube Toolkit Team is a Digital Creator & YouTube Growth Specialist from the Netherlands
As Youtube Toolkit’s lead content writer, he transforms complex technical topics into engaging and helpful guides. His goal is to empower creators, coders, and marketers through clear and actionable content.
With 20+ years of experience in the digital ecosystem, Lucas specializes in bridging the gap between sophisticated technical architecture and practical end-user application. Whether it's deep-diving into YouTube SEO or exploring new SaaS integrations, his writing is designed to deliver immediate value.
Use our free tools to analyze, optimize, and maximize your YouTube channel's potential